How to enable debug logs
Enable debug logs for each SuperTokens component to troubleshoot your integration.
Backend logs
Our backend SDK provides useful logs that can help with debugging.
To enable logging, you need to set the debug setting to true in the init function call:
import supertokens from "supertokens-node";

supertokens.init({
  debug: true,
  supertokens: {
    connectionURI: "...",
  },
  appInfo: {
    apiDomain: "...",
    appName: "...",
    websiteDomain: "...",
  },
  recipeList: [
    /*...*/
  ],
});
import "github.com/supertokens/supertokens-golang/supertokens"
func main() {
supertokens.Init(supertokens.TypeInput{
Debug: true,
Supertokens: &supertokens.ConnectionInfo{
ConnectionURI: "...",
APIKey: "...",
},
})
}from supertokens_python import init, InputAppInfo, SupertokensConfig
init(
debug=True,
app_info=InputAppInfo(api_domain="...", app_name="...", website_domain="..."),
supertokens_config=SupertokensConfig(
connection_uri='...',
api_key='...'
),
framework='flask',
recipe_list=[
#...
]
)Logs on your terminal have the following shape:
com.supertokens {"t": "2022-04-09T08:44:49.057Z", "sdkVer": "...", "message": "Started SuperTokens with debug logging (supertokens.init called)", "file": "..."}t: The time the log generatedsdkVer: Version of the SDK you are usingmessage: The log messagefile: The file and line number from where this log originated.
Frontend logs
Add enableDebugLogs when calling the init function:
You need to make changes to the auth route configuration, as well as to the supertokens-web-js SDK configuration at the root of your application:
import React from "react";
import SuperTokens from "supertokens-auth-react";

SuperTokens.init({
  enableDebugLogs: true,
  appInfo: {
    /*...*/
  },
  recipeList: [
    /*...*/
  ],
});
// this goes in the auth route config of your frontend app (once the pre-built UI script has been loaded)
supertokensUIInit({
enableDebugLogs: true,
appInfo: {
/*...*/
},
recipeList: [
/*...*/
],
});This change goes in the supertokens-web-js SDK configuration at the root of your application:
import SuperTokens from "supertokens-web-js";
import Session from "supertokens-web-js/recipe/session";

SuperTokens.init({
  appInfo: {
    apiDomain: "...",
    appName: "...",
  },
  recipeList: [Session.init()],
  enableDebugLogs: true,
});import SuperTokens from "supertokens-web-js";
import Session from "supertokens-web-js/recipe/session";
SuperTokens.init({
appInfo: {
apiDomain: "...",
appName: "...",
},
recipeList: [Session.init()],
enableDebugLogs: true,
});supertokens.init({
appInfo: {
apiDomain: "...",
appName: "...",
},
recipeList: [supertokensSession.init()],
enableDebugLogs: true,
});import SuperTokens from "supertokens-react-native";
SuperTokens.init({
apiDomain: "...",
enableDebugLogs: true,
});import 'package:supertokens_flutter/supertokens.dart';
void main() {
SuperTokens.init(apiDomain: "...", enableDebugLogs: true);
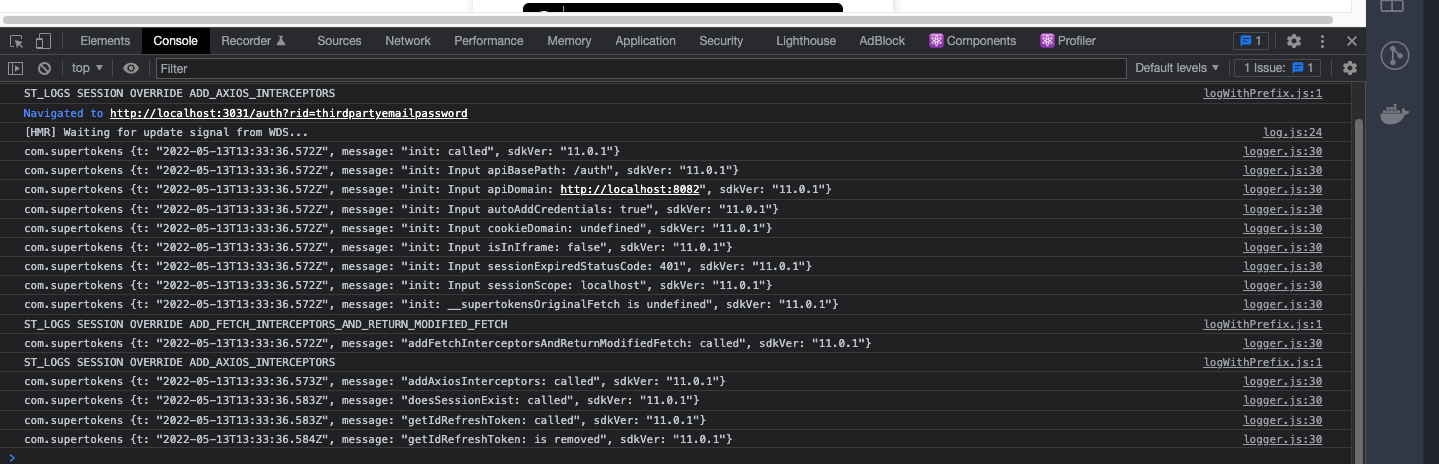
}The above prints out SuperTokens debug log on the browser console:
The above prints out SuperTokens debug logs on the terminal if you’re using the React Native CLI or Expo:
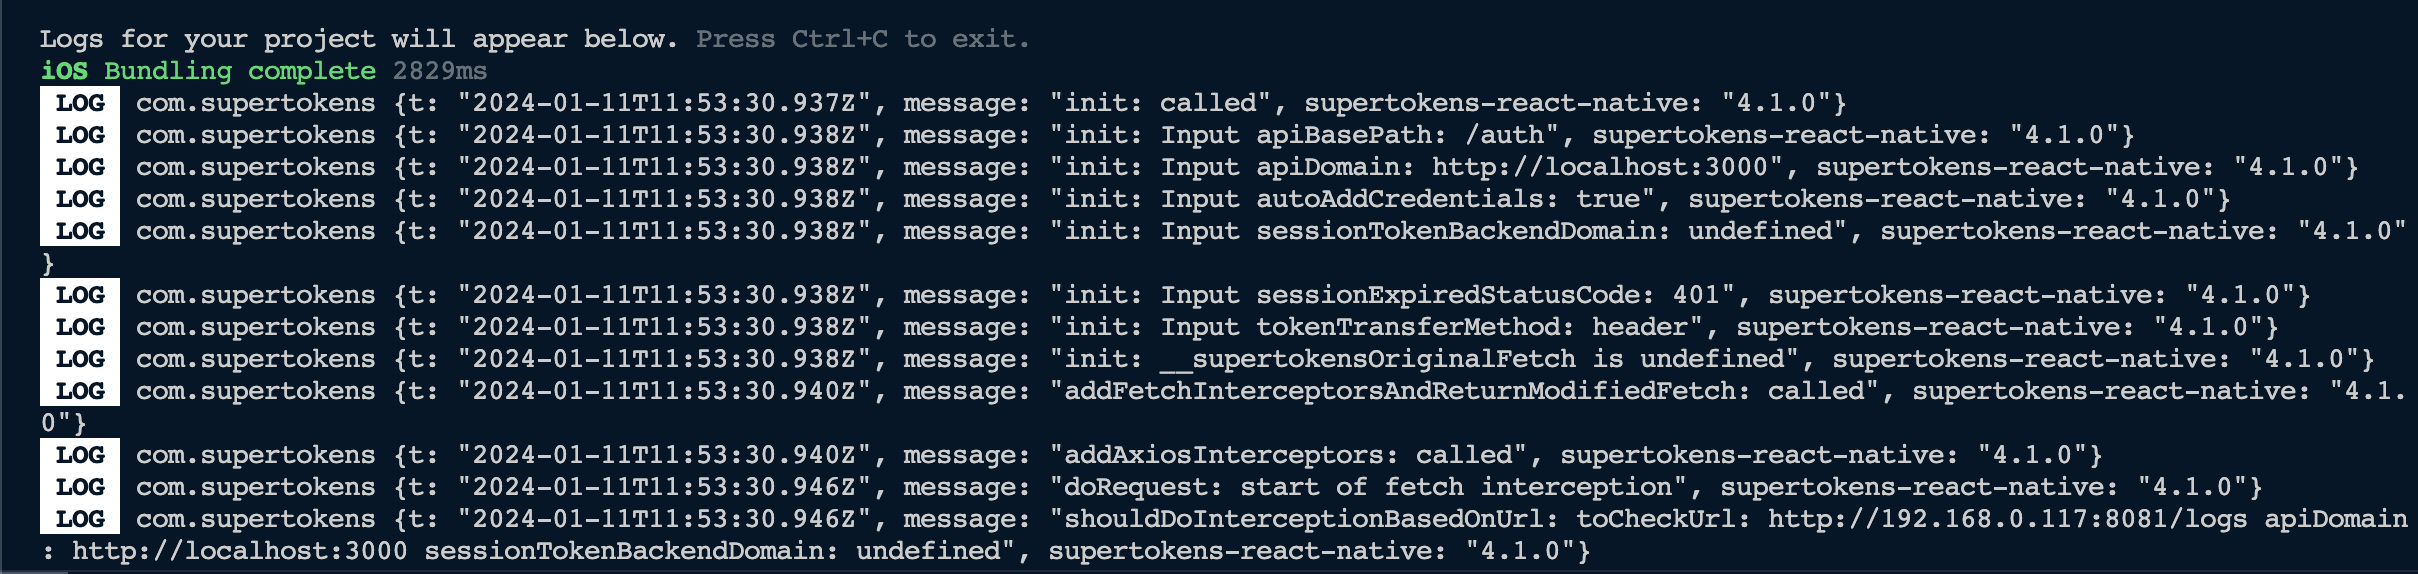
The above prints out SuperTokens debug logs on the terminal:

SuperTokens core logs
If you want to change the log levels, you can set the core’s log_level configuration to reflect this:
DEBUG: Prints out all the log levelsINFO: Prints outINFO,WARNandERRORlevelsWARN: Prints outWARNandERRORlevelsERRORPrints outERRORlevelsNONE: No logs output
By default, the core prints out INFO, WARN, and ERROR logs.
 docker run \
    -p 3567:3567 \
    -e LOG_LEVEL=DEBUG \
    -d supertokens/supertokens-<db_name>
# You need to add the following to the config.yaml file.
# The file path can be found by running the "supertokens --help" command
log_level: "DEBUG"